eamli-operator-docs
Openshift Quick Start
Prerequisites
Customer details
Before you begin, ensure you have recieved your unique customer details. You will need these to correctly set up your Eamli operator. If you have not yet recieved your details, please reach out to support@eamli.com
Public domain name
This is your own public domain, that you will use to serve the eamli platform on (eg example.com)
Namepsace
Create a new namespace for eamli an its related services to live in.
From the Openshift console (as administrator)
- On the sidebar, select Administration -> Namespaces
- From the Namepsaces dashboard, click on the “Create Namepsace” in the top right corner
- Name:
eamli
- Name:
- Once complete, click “Create”.
Alternatively from the command line:
$ oc create ns eamli
Postgresql
To install a new PostgresSQL instance, check out the PostgreSQL Quickstart, for getting setup.
Alternatively, if you already have an existing PostgresSQL instance available, see PostgresSQL for eamli for configuring eamli to communicate with your instance.
Once setup, you should have a secret created in the eamli namespace named eamli-postgresql-auth with the connection details defined.
Database user credentials
$ oc -n eamli create secret generic eamli-database-auth \
    --from-literal DB_ADDRESS=$(oc -n eamli get secret postgres-pguser-productserver -o jsonpath='{ .data.host }' | base64 -D) \
    --from-literal DB_PORT=$(oc -n eamli get secret postgres-pguser-productserver -o jsonpath='{ .data.port }' | base64 -D) \
    --from-literal DB_PRODUCT_SERVER_PWD=$(oc -n eamli get secret postgres-pguser-productserver -o jsonpath='{ .data.password }' | base64 -D) \
    --from-literal DB_SOURCE_DATA_PWD=$(oc -n eamli get secret postgres-pguser-sourcedata -o jsonpath='{ .data.password }' | base64 -D) \
    --from-literal DB_USER_SERVICE_PWD=$(oc -n eamli get secret postgres-pguser-userservice -o jsonpath='{ .data.password }' | base64 -D)
Keycloak
To install a new Keycloak instance, check out the Keycloak Quickstart, for getting setup.
Alternatively, if you already have an existing Keycloak instance available, see Keycloak for eamli for configuring eamli to communicate with your instance.
Once setup, you should have a secret created in the eamli namespace named eamli-keycloak-auth with the connection details defined.
Keycloak user credentials
eamli requires the user credentials that will be used to access Keycloak. These can be found in the credential-eamli-keycloak secret.
Using these credentials, we can then create the eamli secret for connecting to Keycloak. (By default Keycloak creates the master realm), replacing the KEYCLOAK_SMTP_CONFIG properties as appropriate.
If you do not intend to invite users to the platform via email, you can ommit the KEYCLOAK_SMTP_CONFIG property from the secret.
$ oc -n eamli create secret generic eamli-keycloak-auth \
    --from-literal=KEYCLOAK_SCHEME="http" \
    --from-literal=KEYCLOAK_REALM="master" \
    --from-literal=KEYCLOAK_HTTPS="true" \
    --from-literal=KEYCLOAK_PORT="8080" \
    --from-literal=KEYCLOAK_USER=$(oc -n eamli get secret keycloak-initial-admin -o jsonpath='{ .data.username }' | base64 -D) \
    --from-literal=KEYCLOAK_PWD=$(oc -n eamli get secret keycloak-initial-admin -o jsonpath='{ .data.password }' | base64 -D) \
    --from-literal=KEYCLOAK_PUBLIC_KEY="MIIBIjANBgkqhkiG9w0BAQEFAAOCAQ8AMIIBCgKCAQEAjYsLSqw2YdUVzT69GOUS+3dSoIz4MzkIJ4EeHj6Iyg6jsQbPh5It3Q6gyhpIAkEtafcTQ9+bv6Y7D7ka2y/Ik69i+iLJYbH1AiJzCXE6I0SLUs6u6uCL7e1wgkFFRlLXP3NMmawRDRBySHE5VqTmr1biEVpcZ/qqKqeT94doFctVkgCumXfEyiPXiccoKUVEWNj2hsWnpEOfHtXdbOiDbgS6i7WUtPh5Tig+29/t91wvlGIOWDLoUD8WPeP8FtAM3WlhZtB/Bt9l+1Xx3lYvrvO5h9dwP0JwpCtmaLd5wGI7mGI1Ku9pp6Vkg2eQ/TnICNmQcn7BgWZ7febciKNDkQIDAQAB" \
    --from-literal=KEYCLOAK_SMTP_CONFIG='{"password"="***","starttls"="true/false","auth"="true/false","port"="***","host"="***","from"="***","ssl"="true/false","user"="**"}'
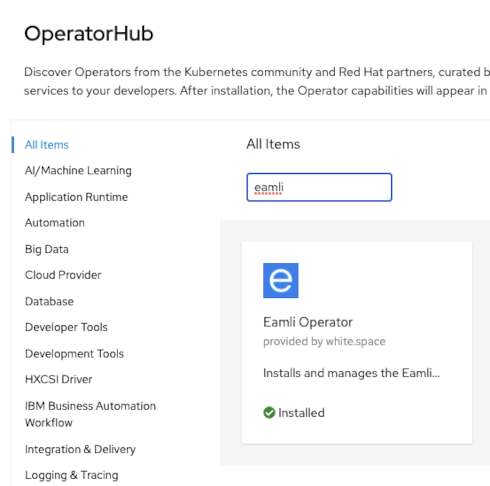
Operator installation from Red Hat Marketplace
- For information on registering your cluster and creating a namespace, see Red Hat Marketplace Docs. This must be done prior to operator install.
- On the main menu, click Workspace > My Software > product > Install Operator.
- On the Update Channel section, select an option.
- On the Approval Strategy section, select either Automatic or Manual. The approval strategy corresponds to how you want to process operator upgrades.
- On the Target Cluster section: o Click the checkbox next to the clusters where you want to install the Operator. o For each cluster you selected, under Namespace Scope, on the Select Scope list, select an option.
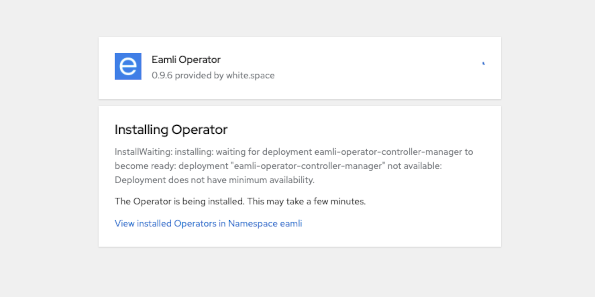
- Click Install. It may take several minutes for installation to complete.
- Once installation is complete, the status will change from installing to Up to date.
- For further information, see the Red Hat Marketplace Operator documentation
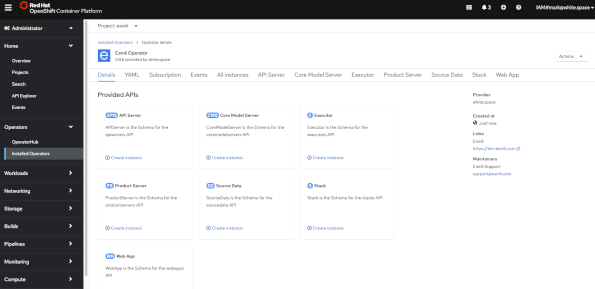
Verification of operator installation
- Once status changes to Up to date, click the vertical ellipses and select Cluster Console.
- Open the cluster where you installed the product
- Go to Operators > Installed Operators
- Select the Namespace or Project you installed on
- Verify status for product is Succeeded
- Click the product name to open details
Application installation
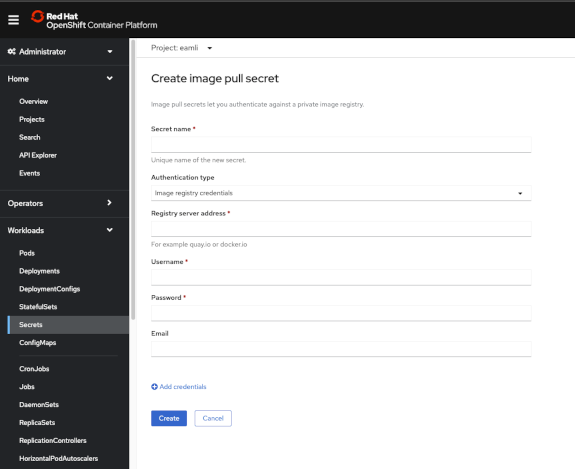
Image pull secret
You will need to install a Kubernetes Secret, to allow the eamli operator to pull down the private images used within the eamli platform.
From the Openshift console (as administrator)
- On the sidebar, select Workloads -> Secrets
- Ensure the “Project”, at the top of the secrets dashboard is set to
eamli - From the Secrets dashboard, click on the “Create” in the top right corner, and select “Image pull secret”.
- Secret name:
eamli-image-auth - Authentication type:
Image registry credentials - Registry server address:
registry.gitlab.com - Username:
[ unique customer username ] - Password:
[ unique customer secret ]
- Secret name:
- Once complete, click “Create”.
Alternatively from the command line:
$ oc -n eamli create secret docker-registry eamli-image-auth \
    --docker-server=registry.gitlab.com \
    --docker-username="`[ unique customer username ]`" \
    --docker-password="`[ unique customer secret ]`"
Public SSL secret
While optional, it is recommended to run eamli with a valid SSL certificate. Using your method of choice, generate a new tls certifate for the domain which will server eamli.
You should have two files once the certifate is created, tls.key and tls.cert.
From the Openshift console (as administrator)
- On the sidebar, select Workloads -> Secrets
- Ensure the “Project”, at the top of the secrets dashboard is set to
eamli - From the Secrets dashboard, click on the “Create” in the top right corner, and select “Key/value secret”.
- Secret name:
eamli-public-tls - key:
tls.key, value: path/to/tls.key - key:
tls.cert, value: path/to/tls.cert
- Secret name:
- Once complete, click “Create”.
Alternatively from the command line:
$ oc -n eamli create secret tls eamli-public-tls \
    --cert=path/to/tls.cert \
    --key=path/to/tls.key
Creating an eamli instance
Now in the Eamli Operator dashboard, select the “Eamli” tab, and click “Create Eamli”. Select “YAML view” and update the YAML with the following, replacing the eamli-core.host value as appropriate:
apiVersion: eamli.com/v1alpha1
kind: Eamli
metadata:
  name: eamli
spec:
  license:
    accept: true
  eamli-core:
    ingress:
      enabled: true
      host: [your domain name]
      tls:
        secretName: eamli-public-tls
    database:
      address: postgres-primary.eamli.svc.cluster.local
    keycloak:
      address: keycloak-service.eamli.svc.cluster.local
For full configuration options see the configuration document.
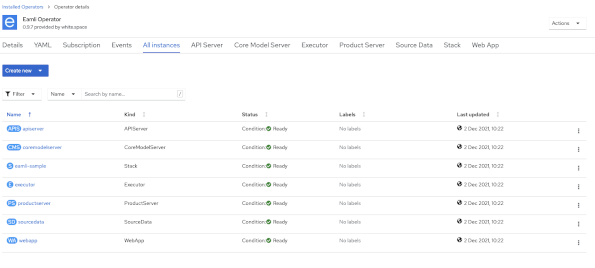
Once applied, it will take a couple of minutes for all the eamli services to be stood up. If you have been following everything within this quick start guide, you can click on the Eamli Operator “All Instances” tab within the Openshift console, to see the status of all the services running.
Alternative, from your console, run oc -n eamli get pods, you should see a similiar output as below:
NAME                                                              READY   STATUS      RESTARTS   AGE
afc56cdfe349220543bd109da2e20ae59ed778a853cb80d953d6499ce64xmdt   0/1     Completed   0          130m
eamli-operator-controller-manager-7c99f78b6f-cw5nb                2/2     Running     0          129m
eamli-ui-946bff9f8-lpjvr                                          1/1     Running     0          128m
eamli-web-546d46c558-5pkw8                                        1/1     Running     0          128m
keycloak-realm-22r4t                                              0/1     Completed   0          126m
model-store-5fd7ddc788-xncjn.                                     1/1     Running     0          126m
productserver-6b65ffb989-vj6dp                                    1/1     Running     0          126m
productserver-seeder-22r4t                                        0/1     Completed   0          126m
sourcedata-7d7c8ddd59-mbrkr                                       1/1     Running     0          126m
sourcedata-seeder-5zpkl                                           0/1     Completed   0          127m
user-service-6d4d96d57b-vn4wl                                     1/1     Running     0          127m
user-service-seeder-ctrwm                                         0/1     Completed   0          128m
gitlab-com-whitedotspace-eamli-eamli-operator-bundle-1-0-0        1/1     Running     0          130m
Initial user
eamli is bootstrapped with a default user, but it requires users to set the user’s password prior to log in.
Head over to https://[YOUR_DOMAIN]/auth, and login with the keycloak admin details
$ oc -n eamli get secret keycloak-initial-admin -o jsonpath='{ .data.username }' | base64 -D
$ oc -n eamli get secret keycloak-initial-admin -o jsonpath='{ .data.password }' | base64 -D
Once logged in, navigate to the eamli realm, and select users -> server-admin -> Credentails -> Reset password
You should now be able to log into the eamli homepage at https://[YOUR_DOMAIN], with the new credentials you created.